Creating your First Property
Starting a property from scratch
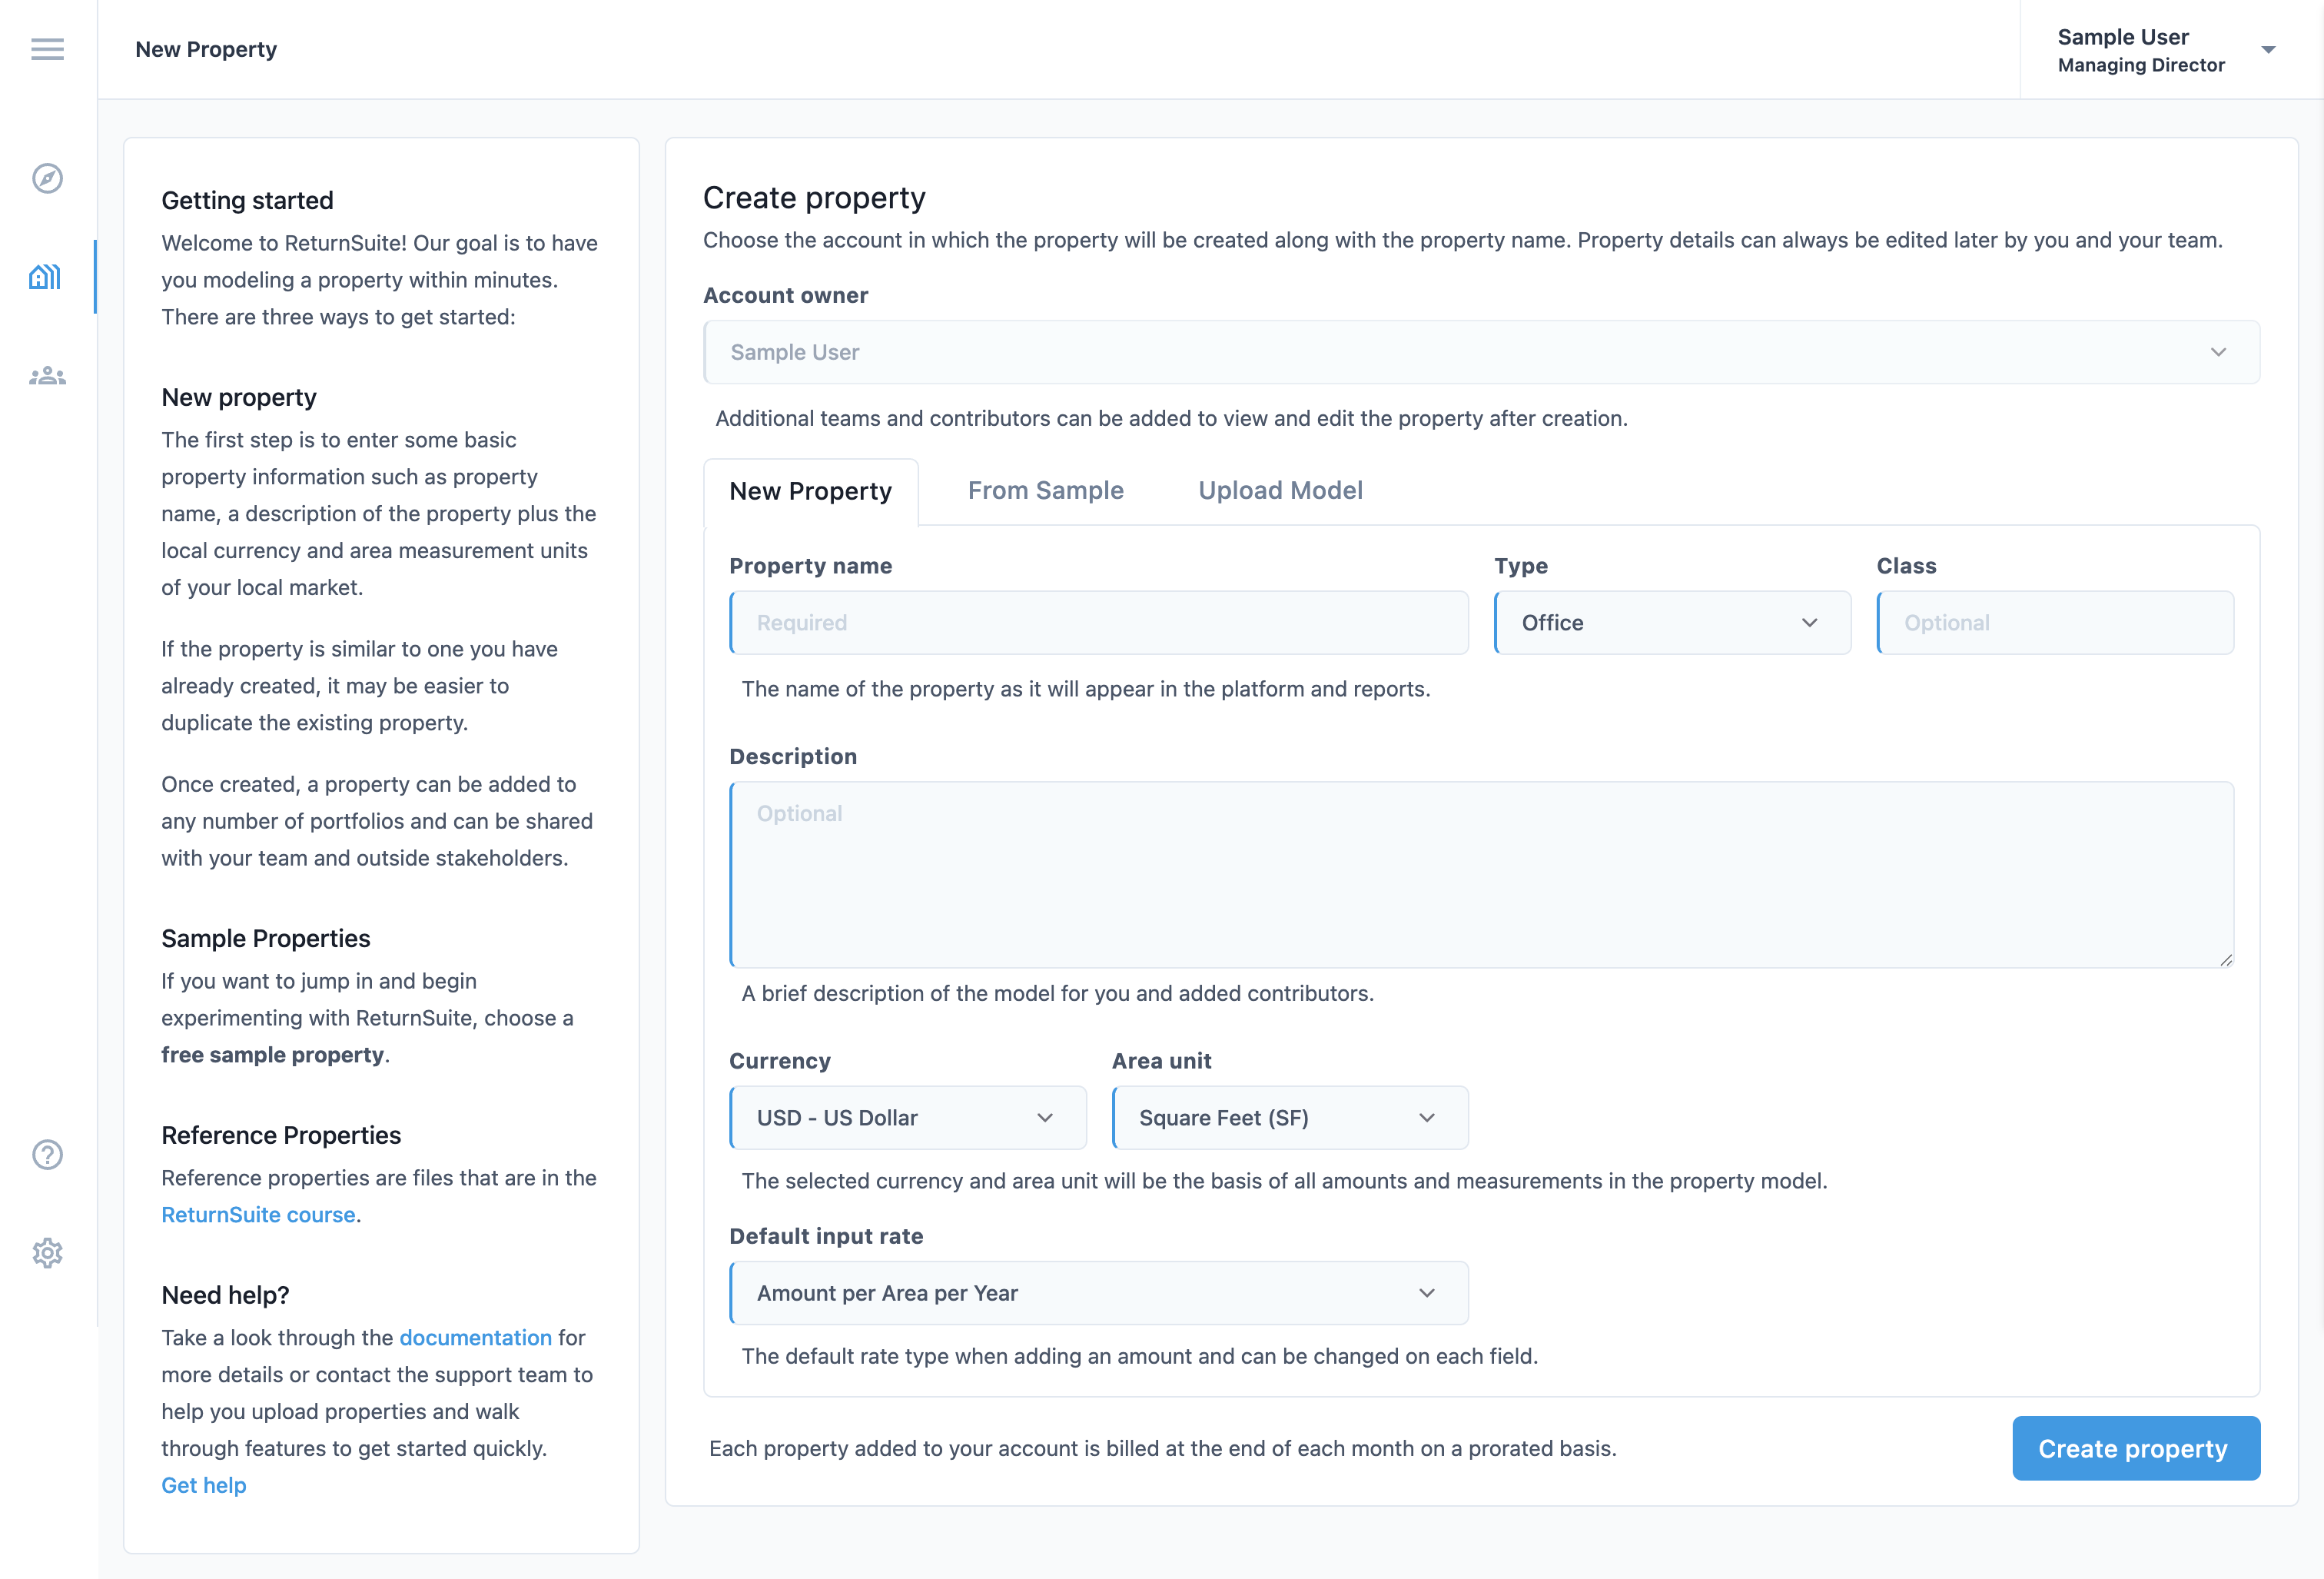
Creating a property from scratch follows the same process as beginning from a sample except all fields are unlocked and blank. Non-sample properties require an active, paid subscription. A checkout modal will appear to complete the process.
Checkout the paid property
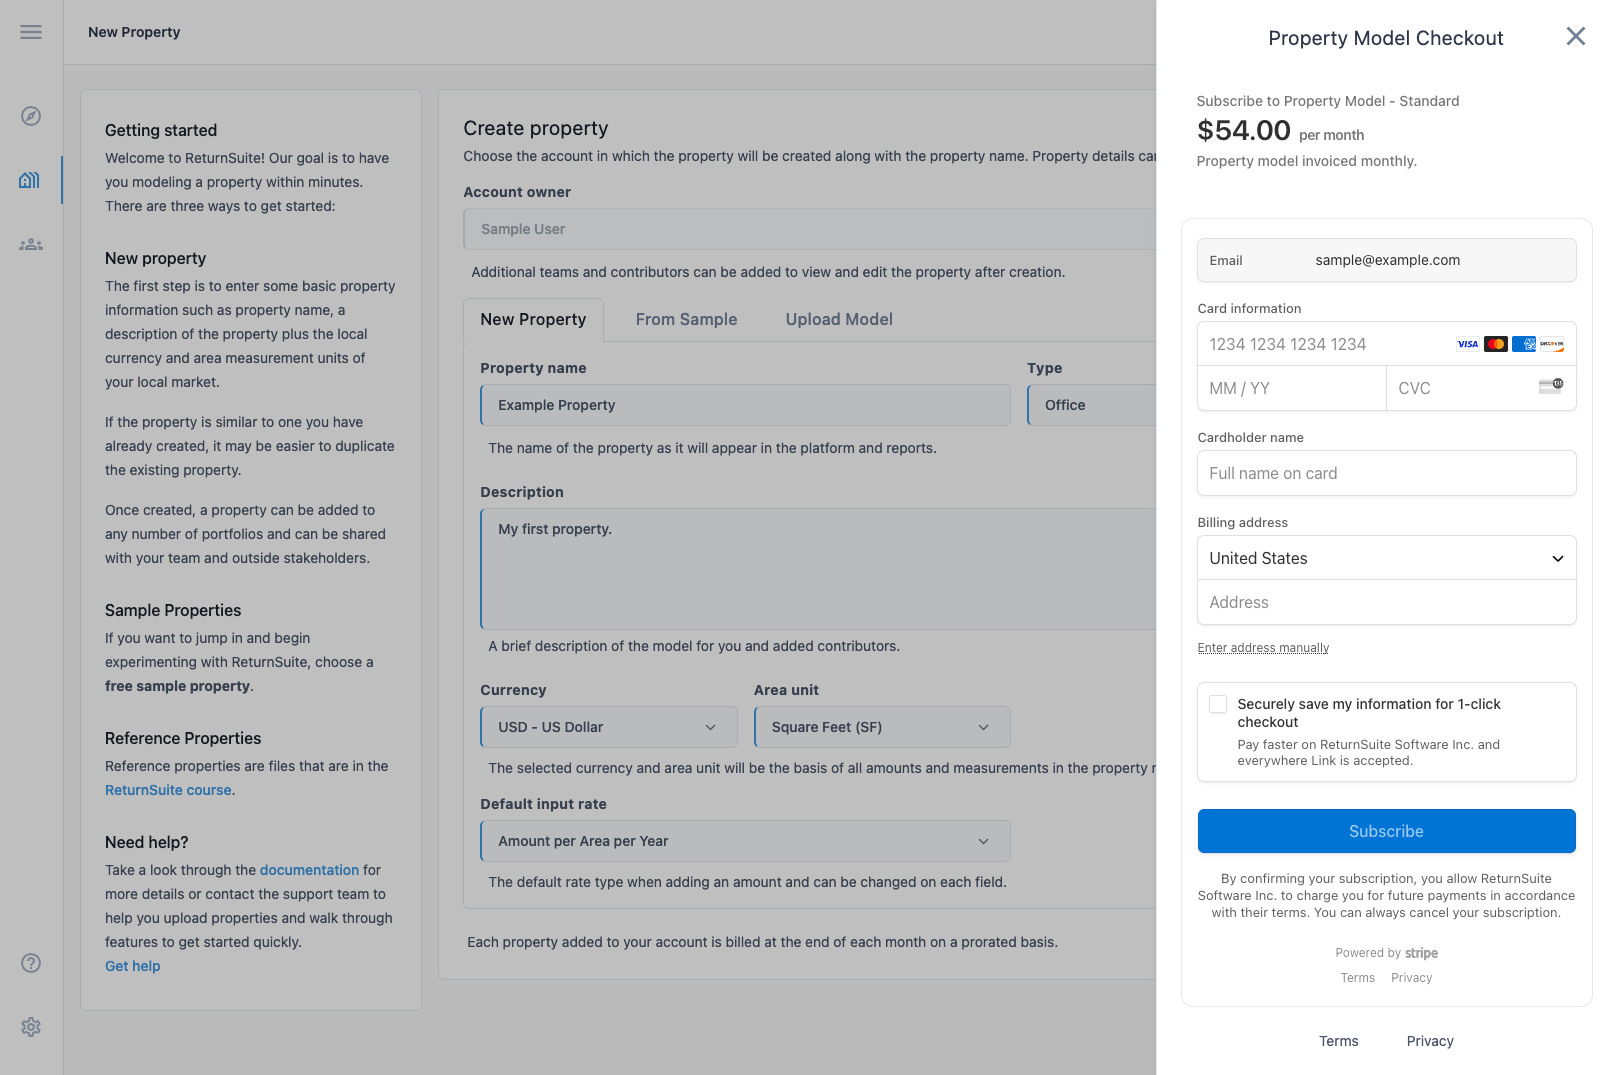
Upon pressing Create property, a checkout modal will slide into view from the right. Complete the secure checkout process by entering your billing details and pressing Subscribe to continue creating a paid property.
Billing information can be updated and managed in account settings at any time. The billing address associated with your card will add any required taxes to the purchase. Invoices can be viewed in the billing section. All receipts are sent by email immediately after the account is charged.
Once complete, you can begin adding property data through the quick start process. The checkout process only needs to be completed on your first property, with all additional properties being added to the existing subscription.