Adjusting the Model
Explore making changes to the model
The model section is where you will find all the input forms to build the cash flow model for your property. Each page provides the forms needed to build the different elements of your cash flow model.
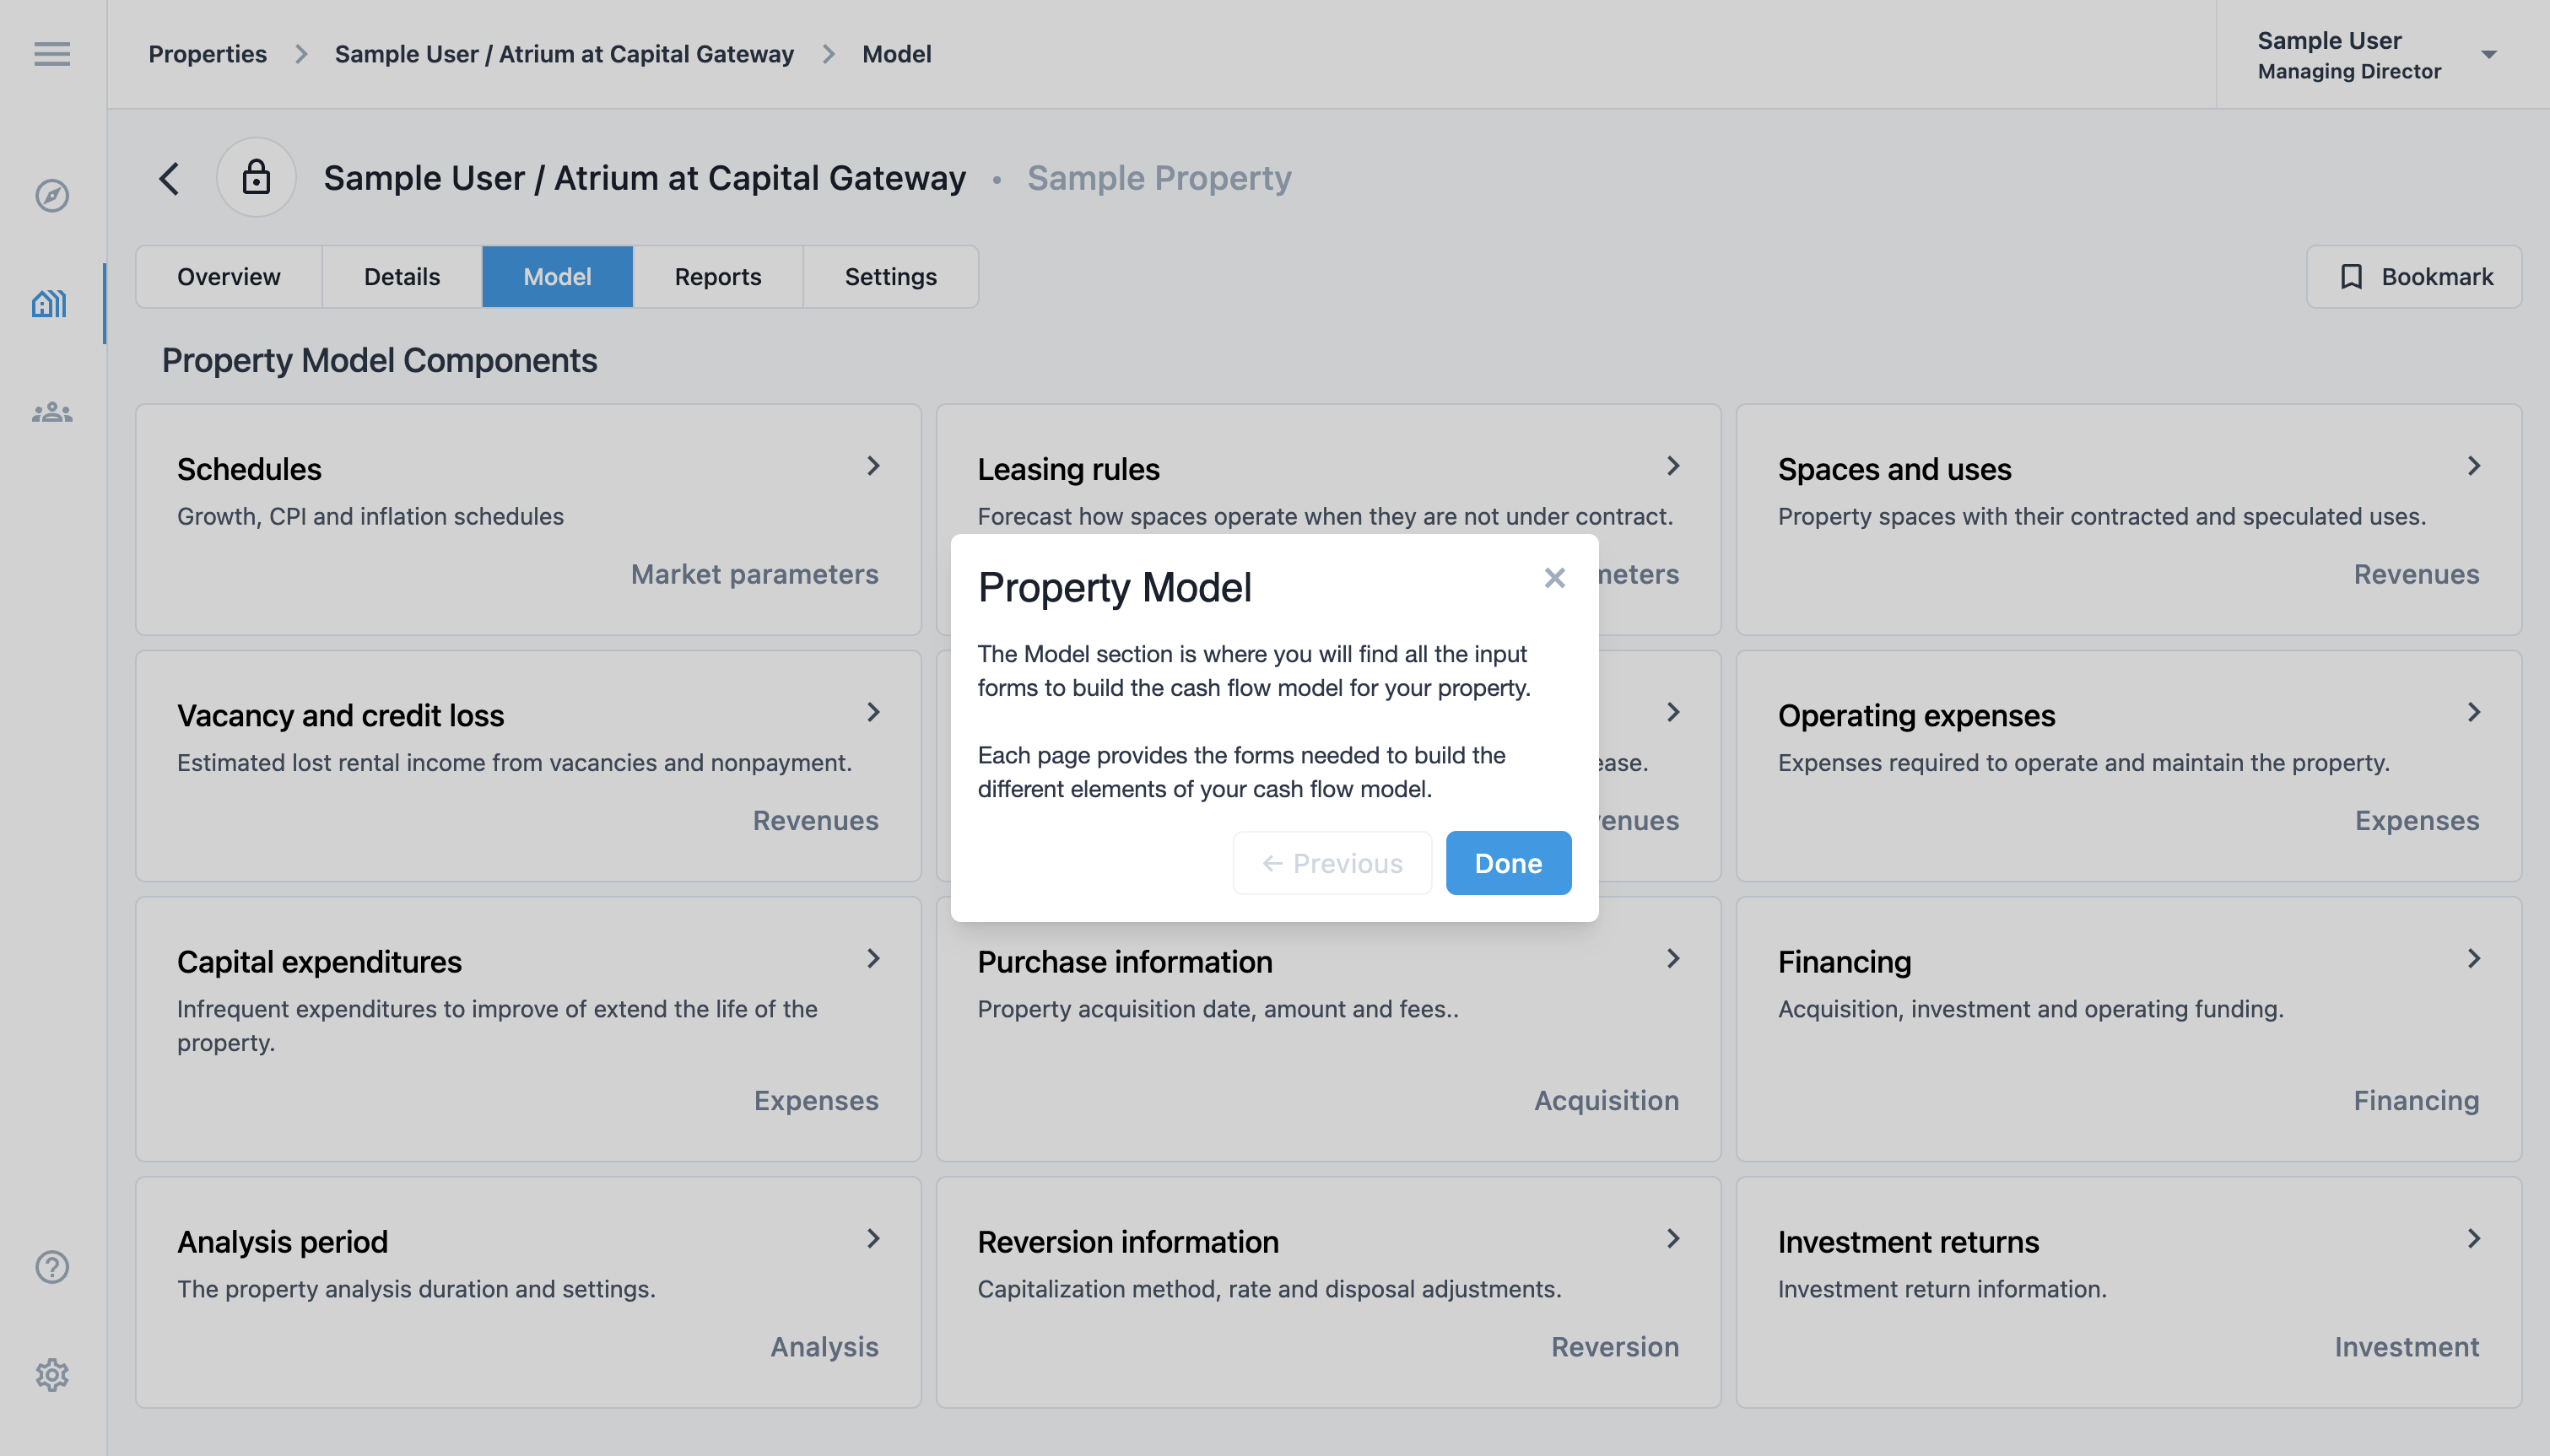
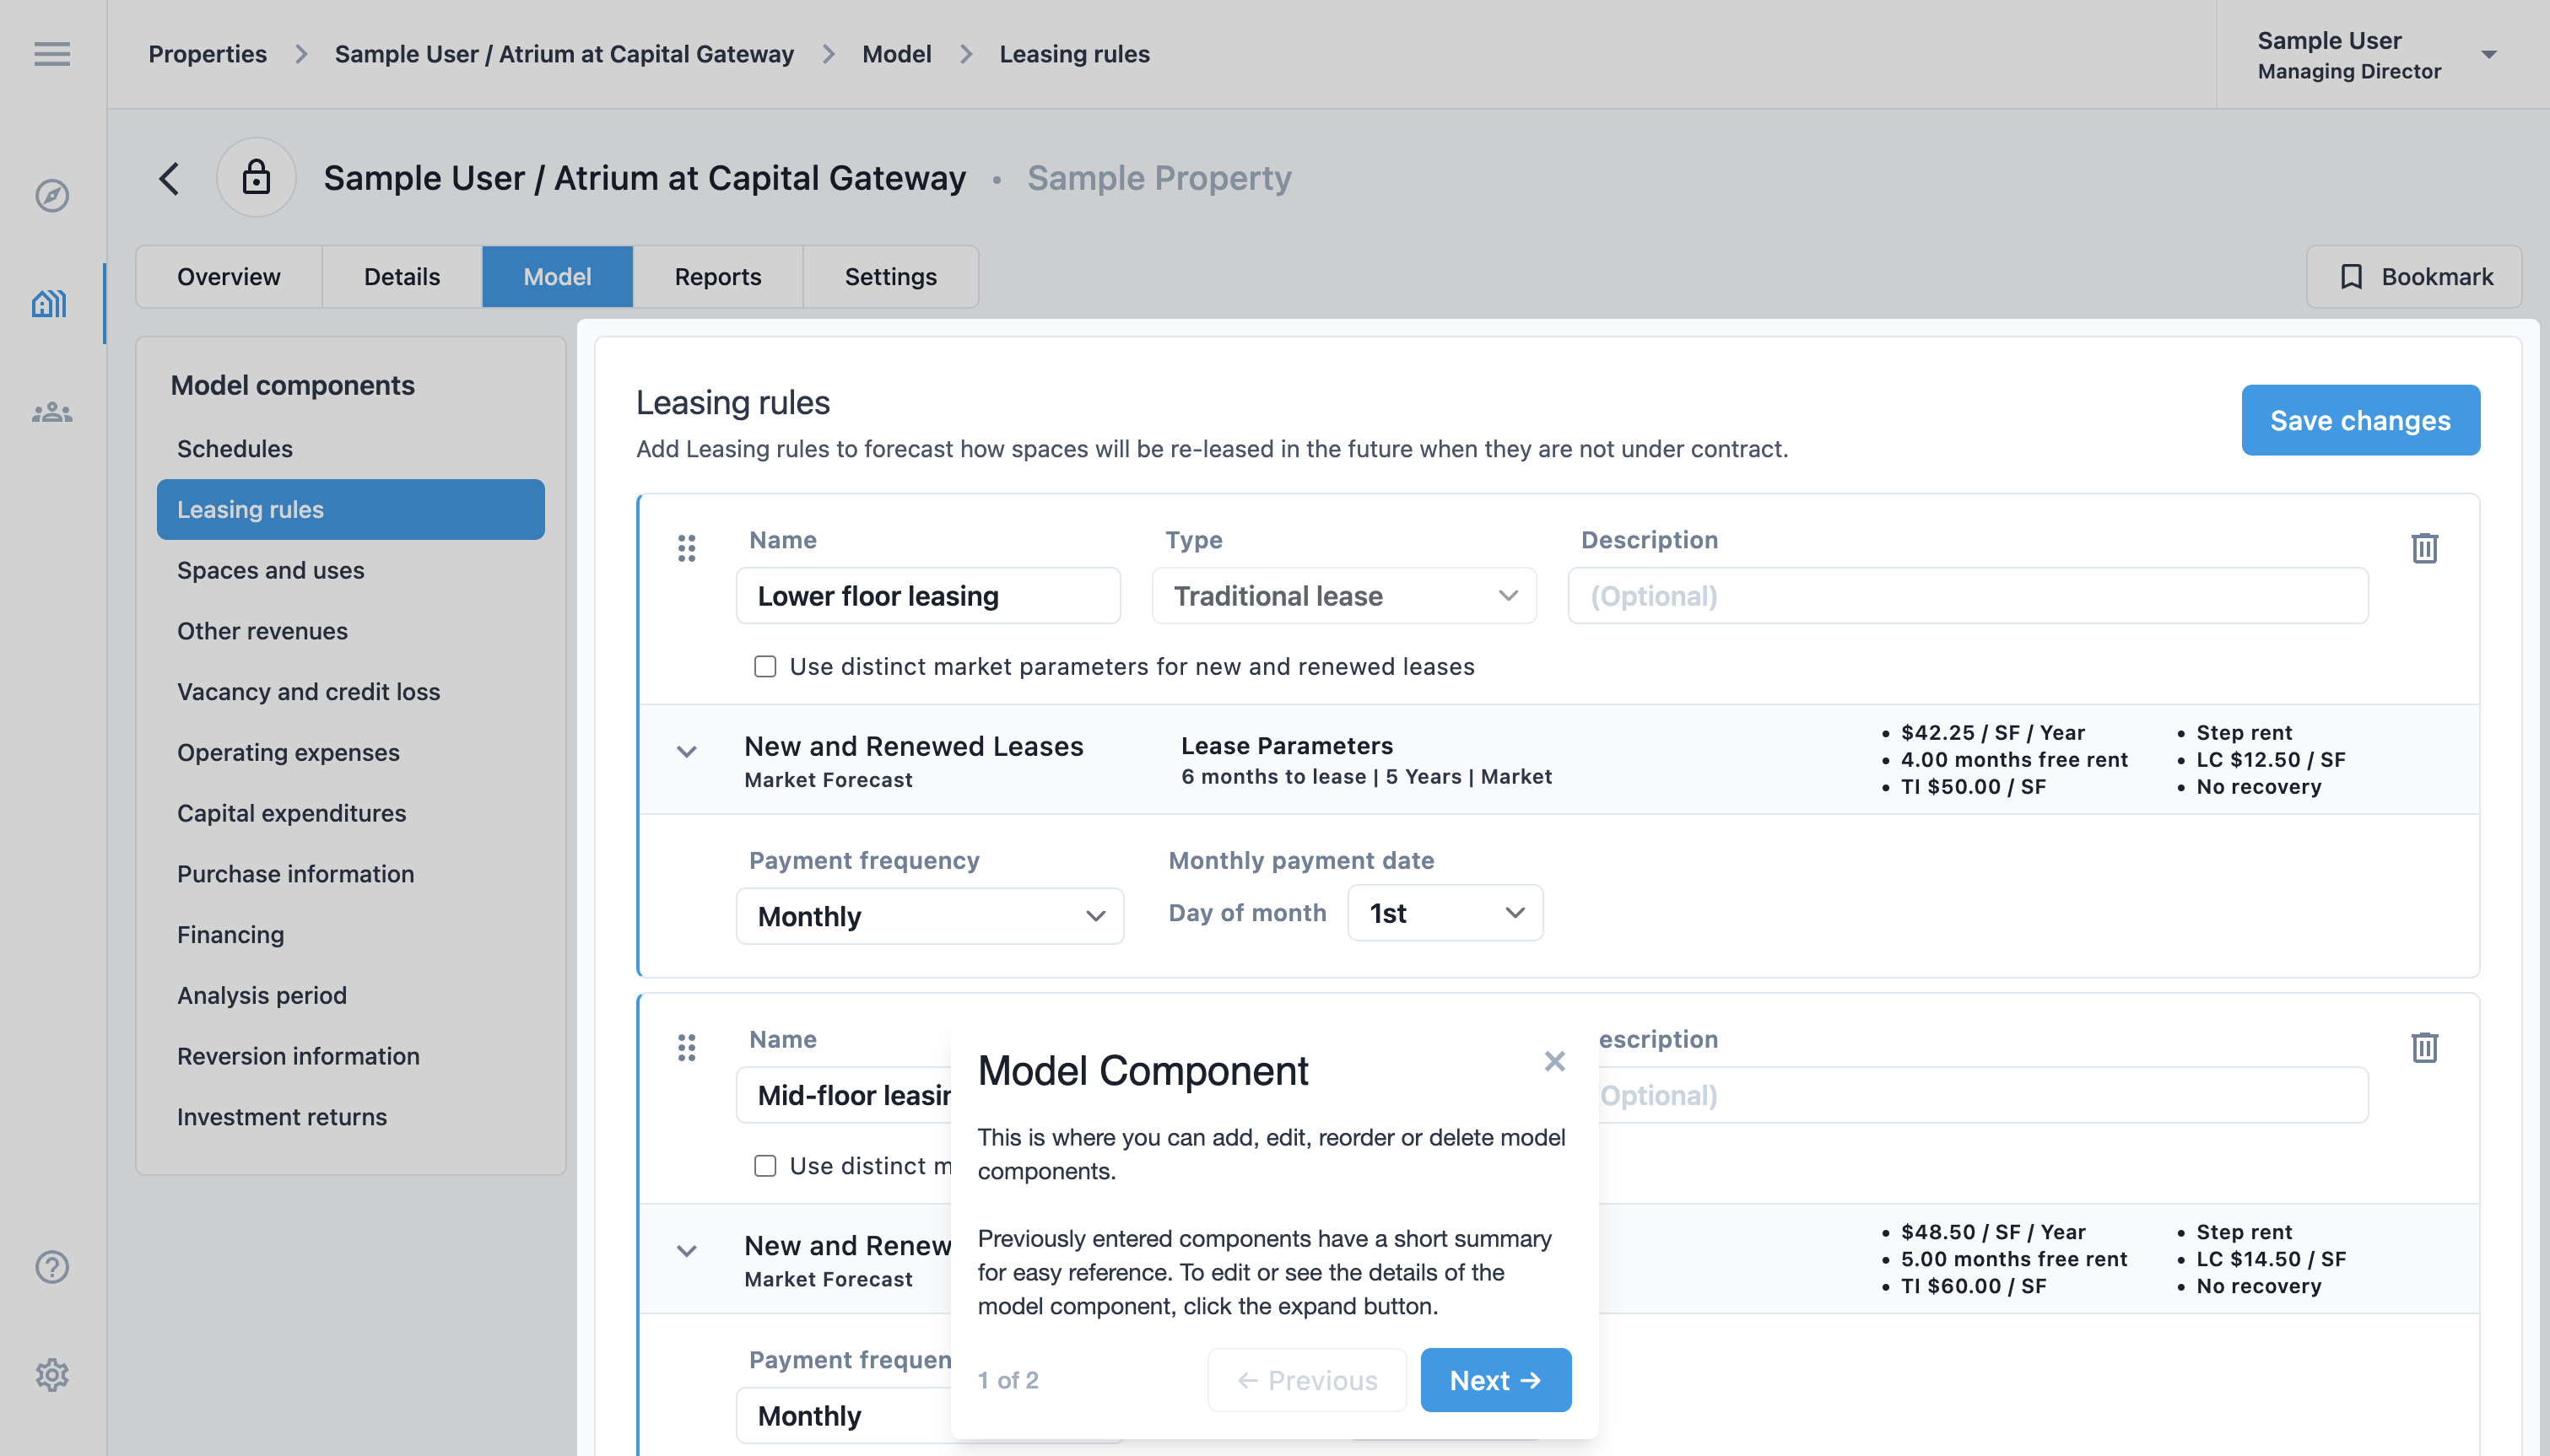
Model components
The model is broken into components for representing each cash flow category of the property. Previously entered components have a short summary for easy reference. To edit the details of a model component, click the expand button. Add, edit, reorder or delete model components using the corresponding buttons.
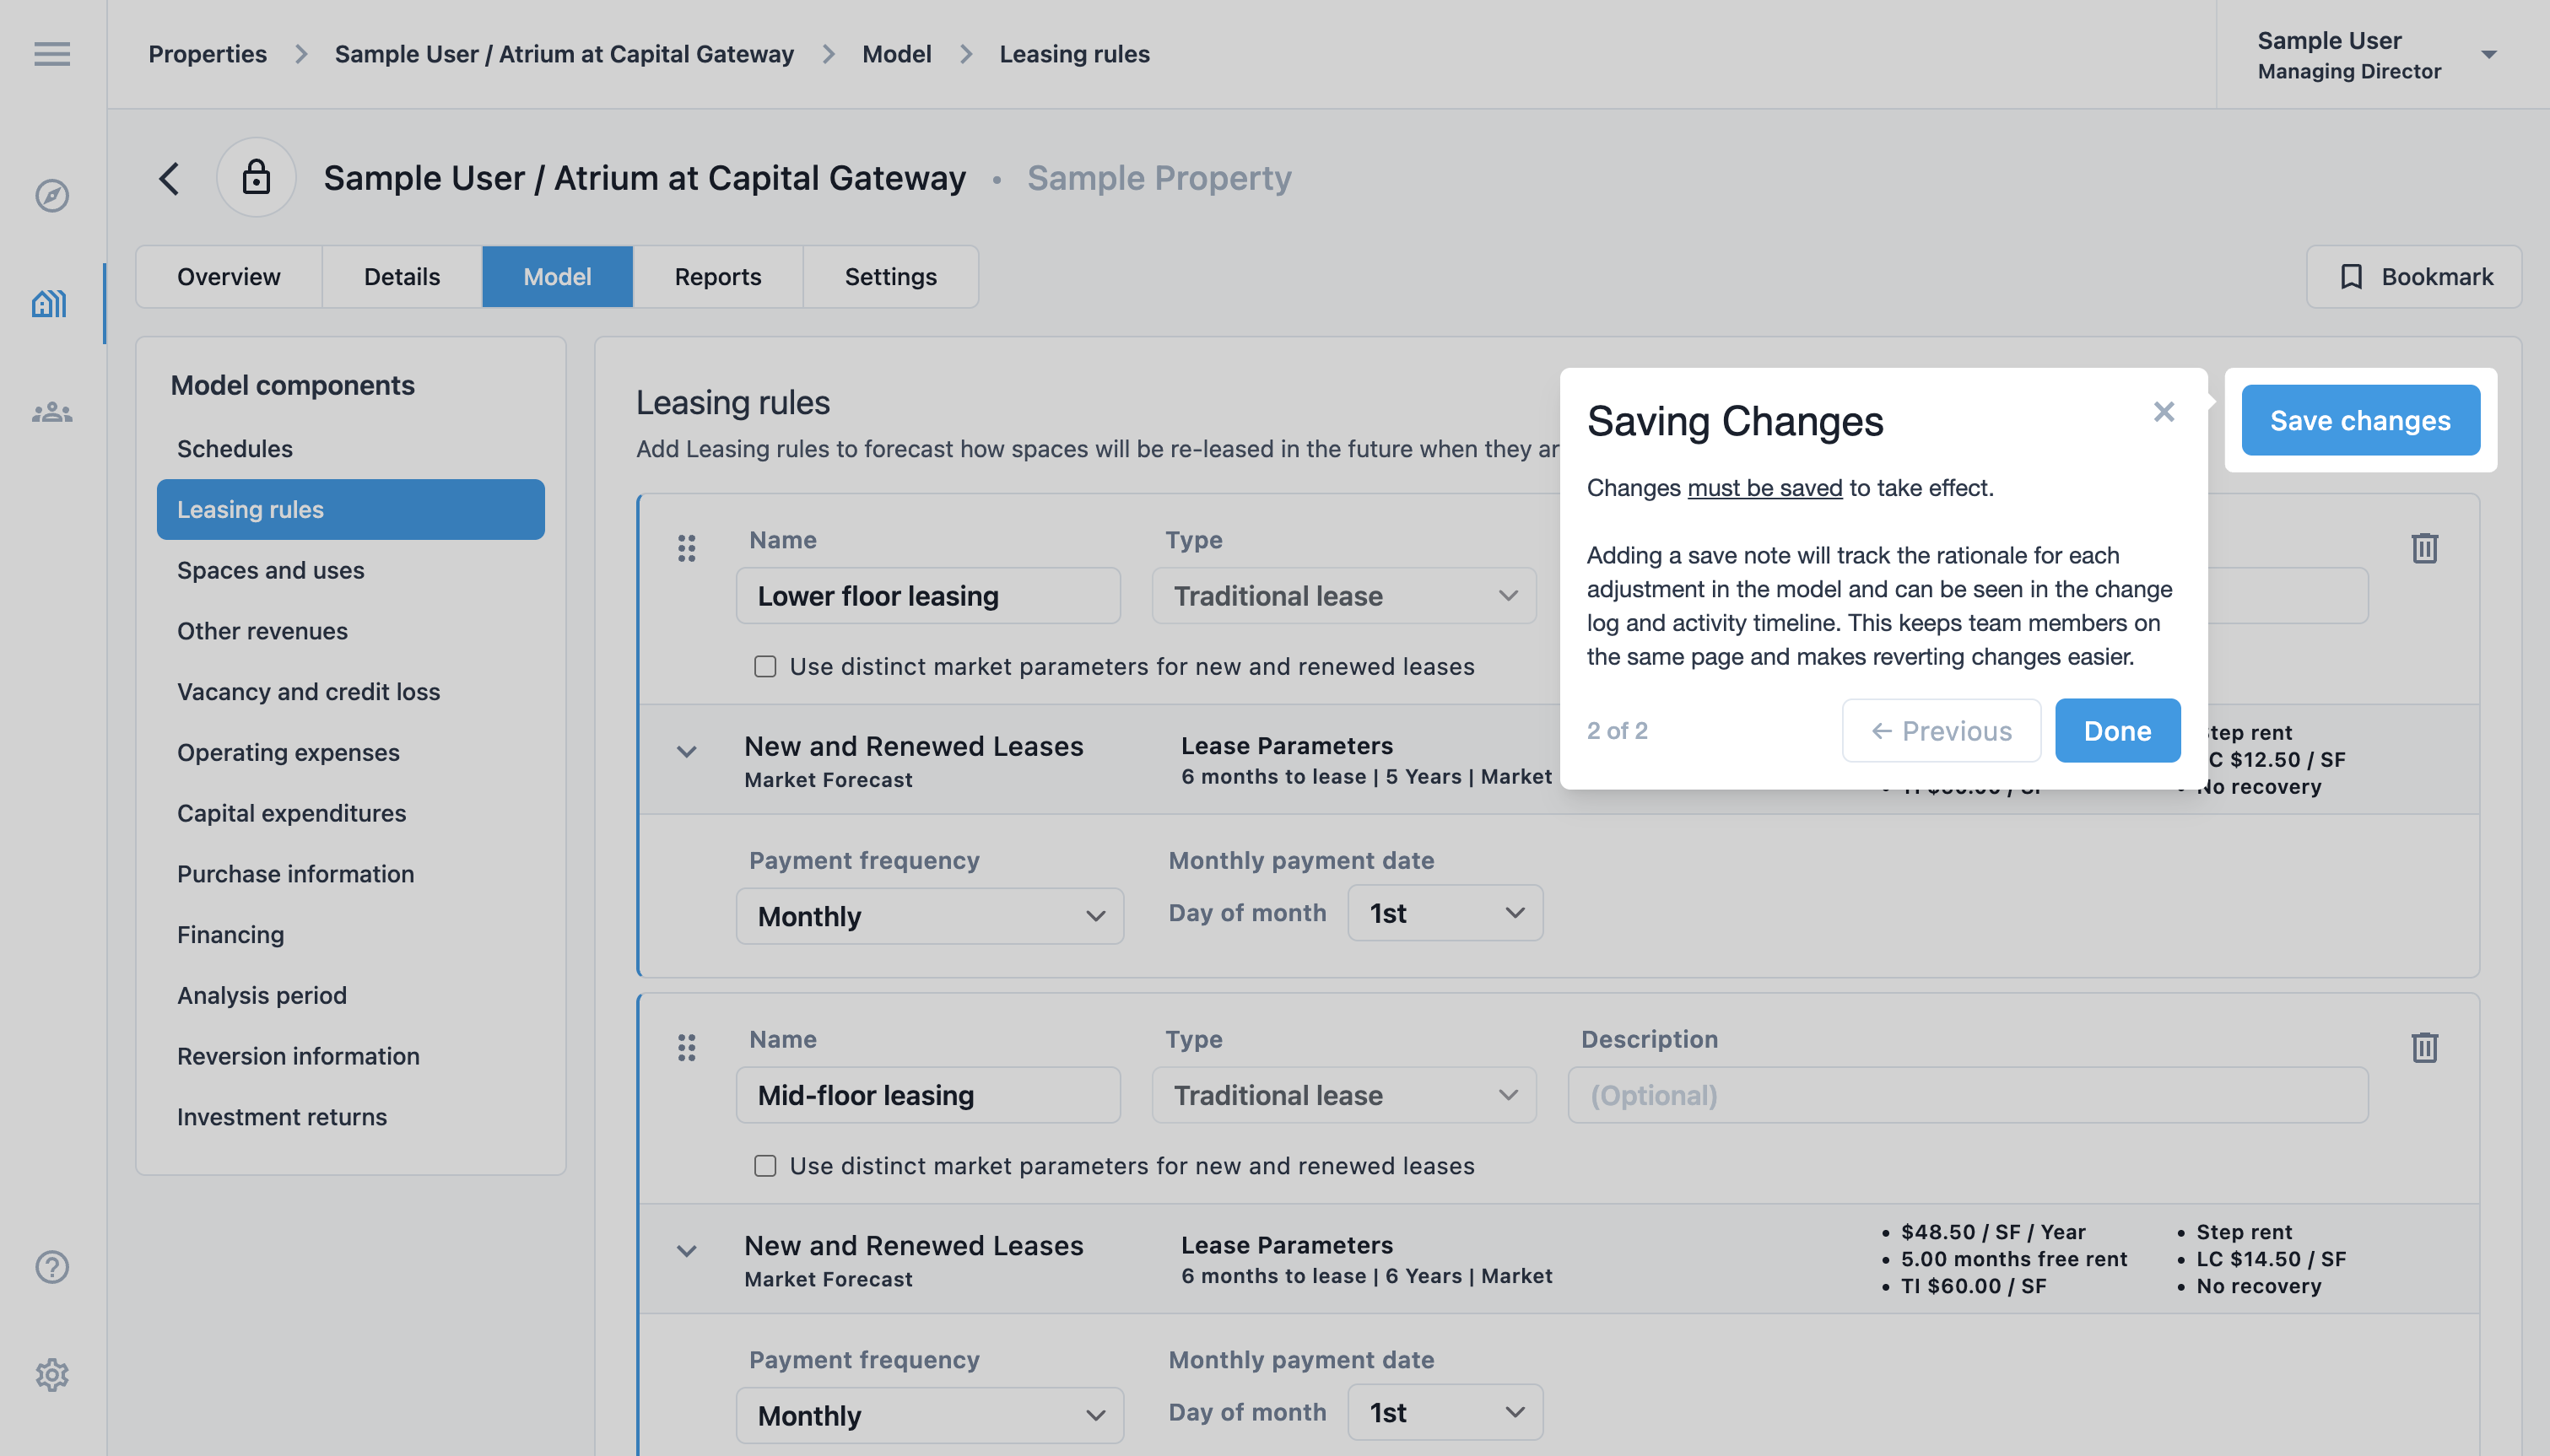
Saving changes
Adding a save note will track the rationale for each adjustment in the model and can be seen in the change log and activity timeline. This keeps team members on the same page and makes reverting changes easier. Changes must be saved to take effect.
Companion documentation and tooltips
Tooltips will appear on every input field and heading with descriptive descriptions when viewing any pages on a small screen.
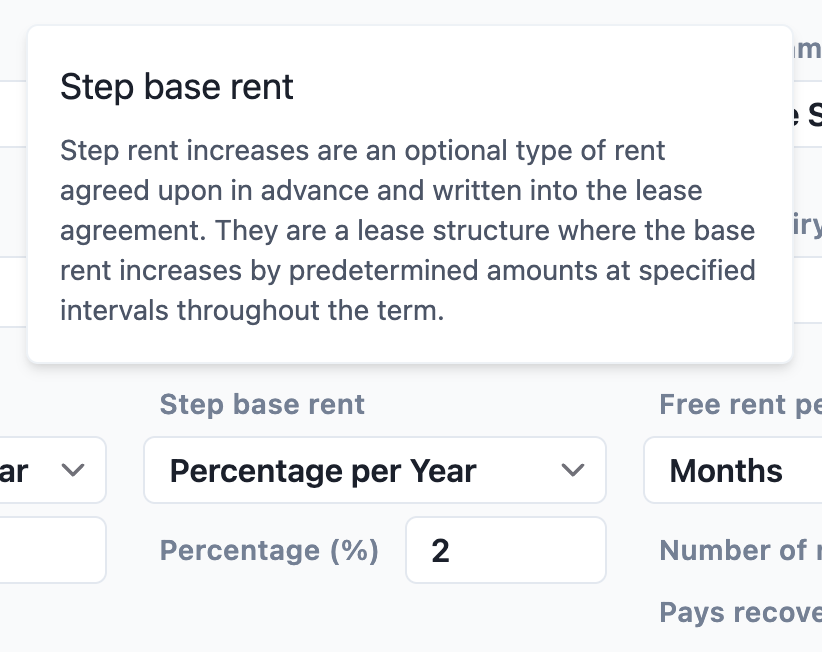
Companion documentation will appear on the right for all input fields and headings. Comprehensive details for every element can be found in the manual Using ReturnSuite.
Select Details on the top menu to continue following the guided walkthrough.